Moving a WordPress website from one hosting company to another may sound difficult, but the process is actually simple if you follow the right steps. Many website owners change hosting for better speed, lower cost, improved support, or more reliable service.
In this guide, you will learn how to migrate a WordPress website from one hosting to another using cPanel hosting. This tutorial is beginner-friendly and explained in easy language.
Why You May Need to Change Hosting
There are many reasons to move your website to a new hosting provider:
- Slow website speed
- Poor customer support
- High renewal cost
- Frequent downtime
- Need more storage or bandwidth
- Better security features
A reliable cPanel hosting service makes website management easy and user-friendly.
Things You Need Before Starting
Before starting the migration process, keep these things ready:
- Access to old hosting cPanel
- Access to new hosting cPanel
- WordPress admin login
- Domain access
- Stable internet connection
You should also take a complete backup before making any changes.
Step 1: Backup Your WordPress Website
The first and most important step is creating a full website backup.
Your WordPress website has two main parts:
- Website files
- Database
You need to backup both.
Backup Website Files
- Login to your old hosting cPanel
- Open File Manager
- Go to the public_html folder
- Select all files
- Click Compress
- Choose ZIP format
- Download the ZIP file to your computer
This file contains:
- Themes
- Plugins
- Images
- WordPress core files
Backup WordPress Database
Now backup the database.
- Open phpMyAdmin from cPanel
- Select your WordPress database
- Click Export
- Choose Quick Export
- Click Go
The database file will download in .sql format.
Keep both files safely on your computer.
Step 2: Add Your Domain to New Hosting
Now login to your new hosting account.
If your hosting account is empty:
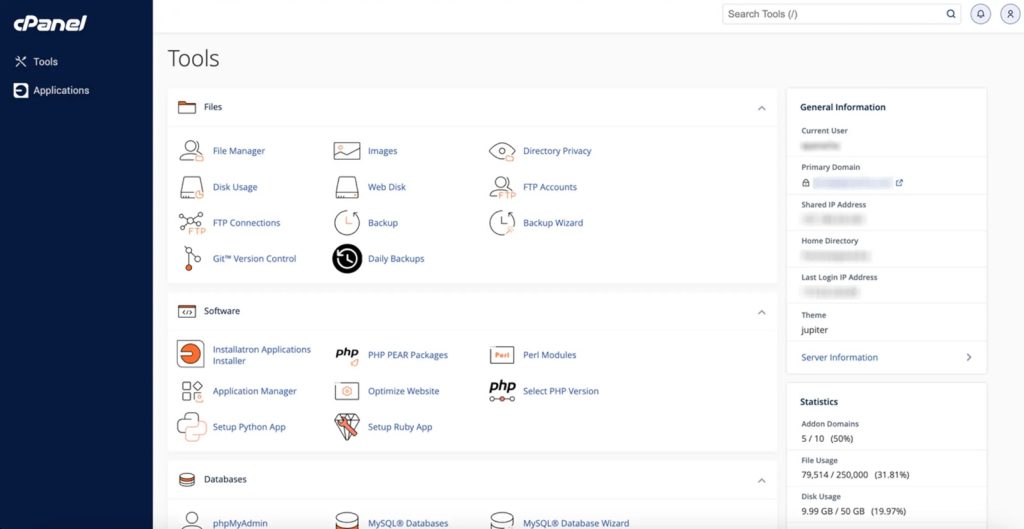
- Open cPanel
- Add your domain name
- Make sure the domain points to the correct folder
Usually, the main domain automatically connects to the public_html folder.
Step 3: Upload Website Files to New Hosting
Now upload the website backup.
- Open File Manager in new hosting cPanel
- Go to
public_html - Click Upload
- Upload the ZIP backup file
After upload:
- Select the ZIP file
- Click Extract
All WordPress files will now appear inside the folder.
Step 4: Create a New Database
Now you need a new database in the new hosting account.
Create Database
- Open MySQL Database Wizard
- Create a new database name
- Create a database user
- Set a strong password
- Add the user to the database
- Give All Privileges
Save these details carefully:
- Database name
- Username
- Password
You will need them later.
Step 5: Import the Old Database
Now import your old website database.
- Open phpMyAdmin
- Select the new database
- Click Import
- Upload the
.sqlbackup file - Click Go
Wait until the import process finishes successfully.
Step 6: Update wp-config.php File
Now connect WordPress with the new database.
- Go to File Manager
- Open
public_html - Find the file named
wp-config.php - Click Edit
Update these lines with new database details:
define('DB_NAME', 'your_new_database_name');
define('DB_USER', 'your_new_database_user');
define('DB_PASSWORD', 'your_new_password');
define('DB_HOST', 'localhost');
Save the file.
This step is very important because WordPress needs the correct database connection.
Step 7: Change Domain Nameservers
Now point your domain to the new hosting server.
You can find nameservers in your new hosting welcome email.
Example:
- ns1.newhosting.com
- ns2.newhosting.com
Update Nameservers
- Login to your domain provider account
- Open DNS or Nameserver settings
- Replace old nameservers with new ones
- Save changes
DNS propagation may take:
- 30 minutes to 24 hours
During this time, your website may open from old or new hosting.
Step 8: Test Your Website
After propagation completes:
- Open your website
- Check all pages
- Test forms
- Test images
- Check menu links
- Login to WordPress admin
Make sure everything works properly.
Step 9: Fix Common Migration Problems
Sometimes small issues happen after migration. Here are simple fixes.
Website Showing Error Establishing Database Connection
This usually happens because:
- Wrong database name
- Wrong username
- Wrong password
Check wp-config.php again carefully.
Images Not Loading
Possible reasons:
- Files not uploaded correctly
- Wrong file permissions
Try:
- Re-uploading missing files
- Setting folder permission to 755
- Setting file permission to 644
White Screen Problem
This may happen because:
- Plugin conflict
- PHP version issue
Solution:
- Disable plugins from File Manager
- Change PHP version from cPanel
Step 10: Install SSL Certificate
SSL keeps your website secure and improves trust.
Most hosting providers offer free SSL.
Enable SSL
- Open SSL/TLS section in cPanel
- Activate free SSL
- Force HTTPS
You can also use plugins like:
- Really Simple SSL
Step 11: Clear Cache
After migration:
- Clear browser cache
- Clear WordPress cache plugin
- Clear CDN cache if used
This helps load the latest website version.
Best Tips for Safe WordPress Migration
Follow these important tips:nual Migration vs Migration Plugin
There are two popular methods:
Manual Migration
Advantages:
- Full control
- Better learning
- No plugin limits
Disadvantages:
- Takes more time
- Slightly technical
Migration Plugin
Popular plugins:
- All-in-One WP Migration
- Duplicator
- UpdraftPlus
Advantages:
- Beginner-friendly
- Faster process
Disadvantages:
- Some plugins have size limits
- Premium features may cost money
How Long Does WordPress Migration Take?
The migration time depends on:
- Website size
- Internet speed
- Hosting server speed
Small websites may take:
- 30 minutes to 1 hour
Large websites may take:
- Several hours
How to Choose Reliable cPanel Hosting
Before buying hosting, check:
- SSD storage
- Good uptime
- Fast support
- Free SSL
- Daily backup
- LiteSpeed server
- Easy cPanel access
A good hosting provider improves website speed and security. Migrating a WordPress website to a new hosting provider is not as difficult as many people think. If you follow each step carefully, you can move your website safely without losing data.
The most important parts are:
- Taking a complete backup
- Importing the database correctly
- Updating the wp-config.php file
- Changing nameservers properly
Using reliable cPanel hosting makes the process easier and helps your website run smoothly after migration.
Take your time, follow every step carefully, and your WordPress website will successfully move to the new hosting server.